When fitting pipes, unless the job is very simple, the chances are you’ll need to bend them to fit around fixtures and fittings. Learning the correct way to bend pipework is an essential skill for any plumber, so here’s how to do it correctly.
Step 1. Choose bending method
First of all, you need to think about which kind of pipe bending you are going to use. There are two main types:
- precision bending
- estimated bending (see step 9)
Let’s start off with precision bending, for which you’ll need a set start point. For this guide we’ll use an end as a start point, as pictured.
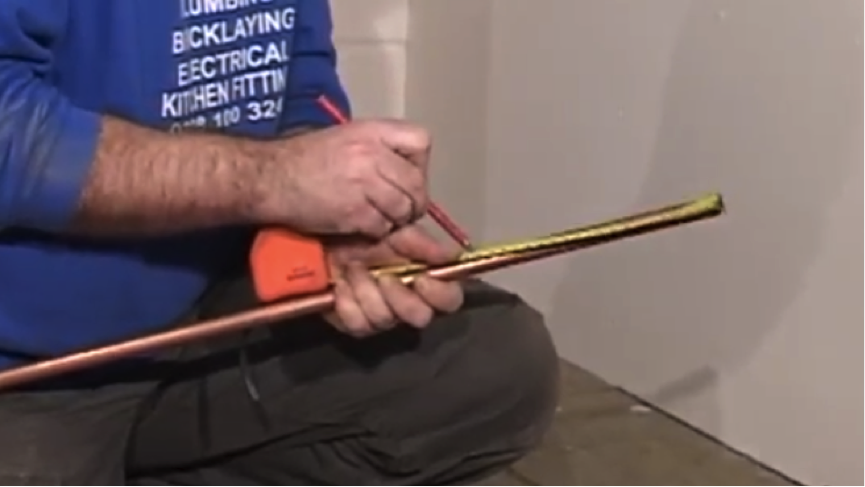
Step 2. Measuring up
Measure down 200mm and mark the pipe with a nice clear line, so that you know exactly where the bend will be located.
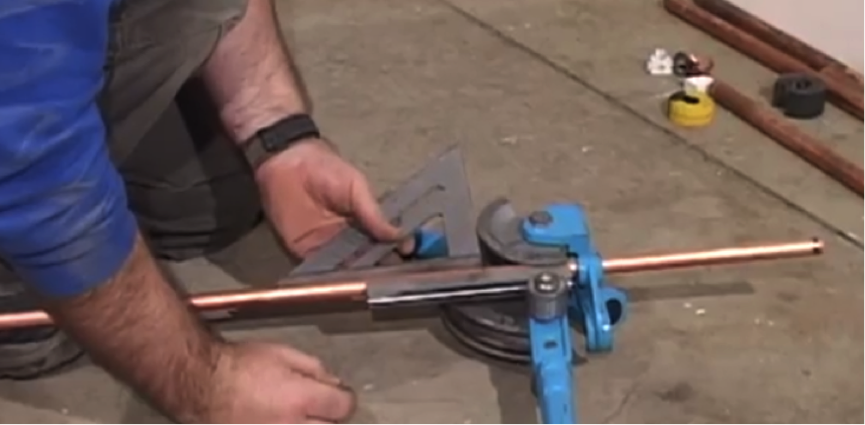
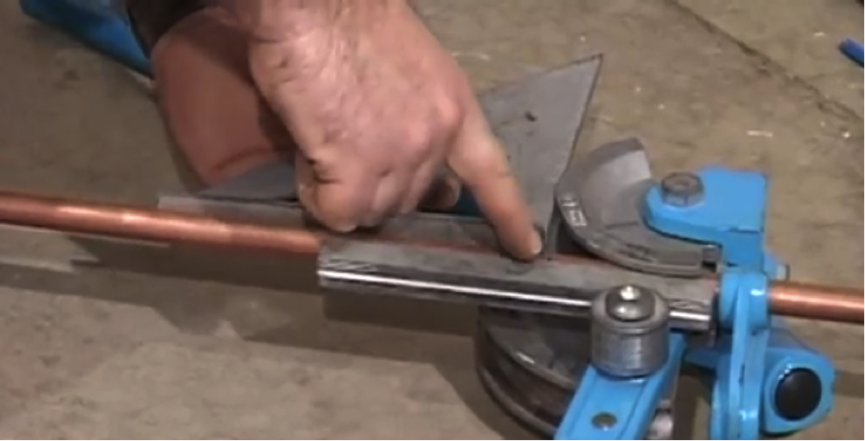
Step 3. Setting the pipe
In this example, we’re going to bend the pipe 90 degrees. So, slot the pipe in and bring up the stop. Insert the guide with the curved side toward the pipe and taper the slack by closing the bender slightly so that it grips the pipe firmly.

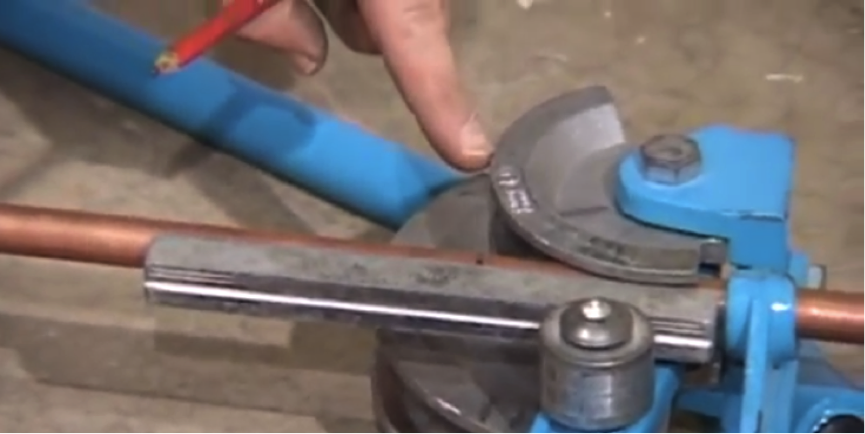
Step 4. Making it straight
Once held firmly, you’ll need to perfectly align the point you marked for bending with the outside of the former. This will ensure the centre of the bend is 200mm from the fixed point (in this case the end of the pipe)
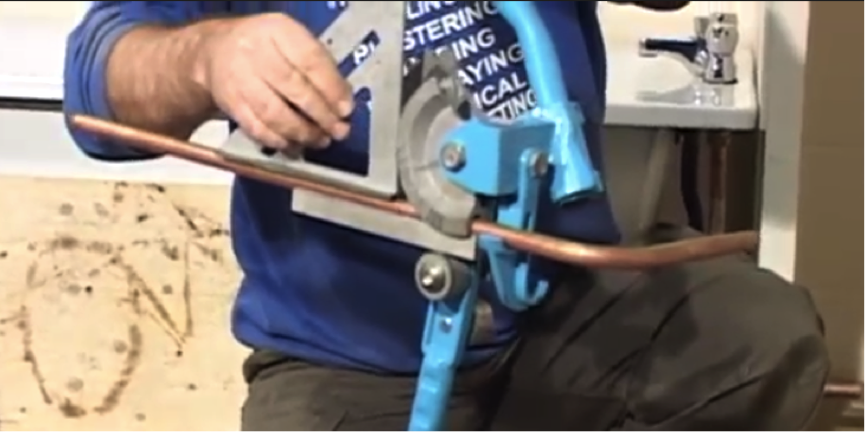
Step 5. Check your work
You can make sure the alignment is correct by using your set square. It’s important you only bend when you are sure the measurements are square or it will affect the results.
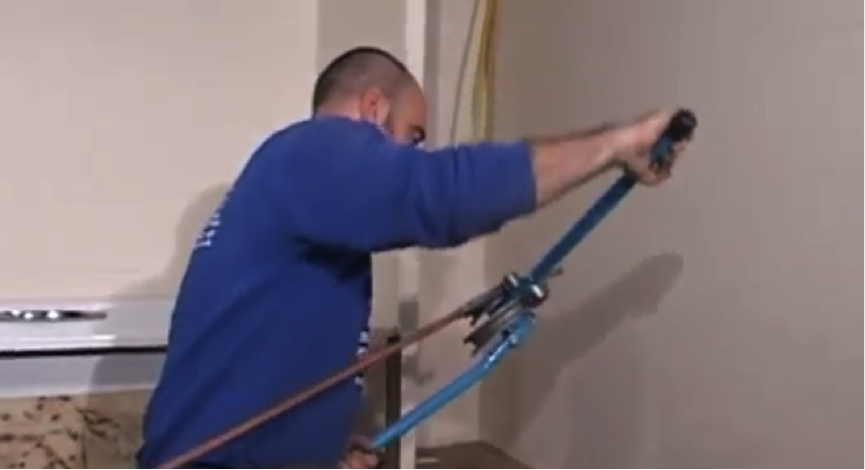
Step 6. Apply the pressure
Once you’re sure it’s aligned, pick up the benders and apply power with your right hand, keeping an eye on the measurement to make sure it doesn’t slip. Move the benders so that you can complete the bend by closing the arms together.
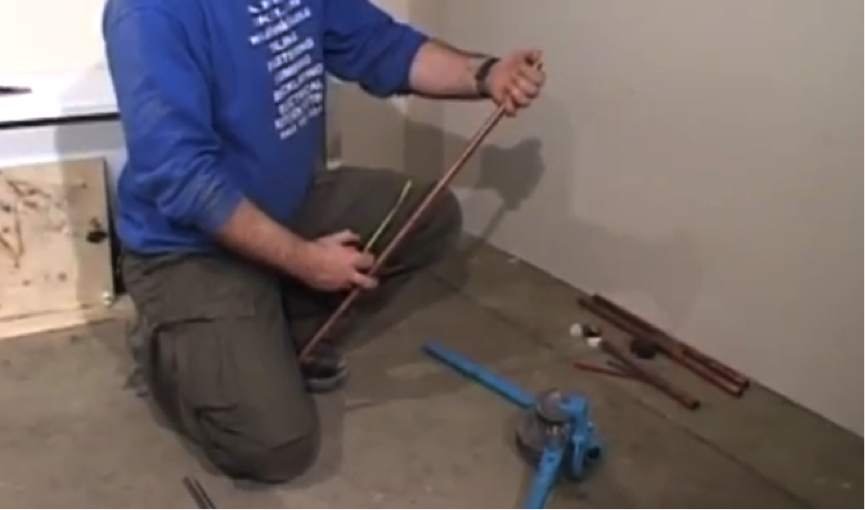
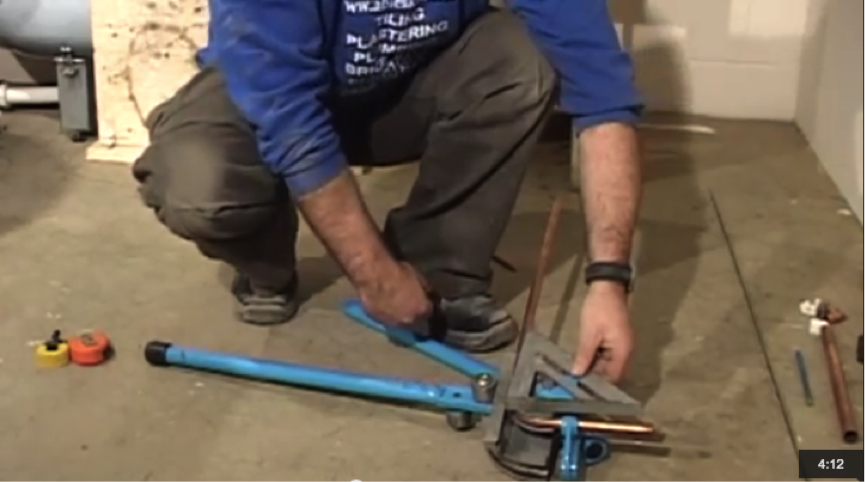
Step 7. Double check your work
Take the power off the bender and slacken slightly. The standing end (shorter part extending upwards from the bending point) will not have moved but the running end (longer part of pipe) has been bent.
- Using your set square, check the standing end against the running end to ensure it’s 90 degrees
- You can also check the length of the 200mm section by removing the pipe from the bender
Step 8. Bend again
Any further bends in the pipe will work in the exactly the same way as above Measure out and mark your required length before fixing the pipe in the bender.
- Take care to ensure you are bending the pipe in the required direction
- Don’t worry too much as pipes can usually be soldered together
- Remember to double check your marks are lined up and square before bending, again using your set square
Step 9. Estimated bending
If this method is slightly tricky for you, then you can try estimated bending. The end you measure from should always go in the top of the bender. Now repeat the setting and checking processes from steps two to five.
Use your ‘plumbers eye’ to bend to 90 degrees and then use a set square to check.