As a homeowner, or DIY enthusiast, there are certain basic skills you should have. Having the ability to rewire a plug is one of these skills, since it’s important to recognize the signs of instability in electrical appliances. And, when the need calls, be able to replace the plug. Honestly, it’s not as difficult as you might think it is, but it’s important to remain safety conscious while you’re taking on the task. Obviously, UNPLUG the plug before you do anything!
Plug n’ Wires:
Everyone’s seen a plug before, but most people haven’t taken a minute to take a look at what’s under that deceptively placid plastic cover. The main wire trailing out of your appliance is covered in white insulation tape, underneath that, you’ll find three smaller wires which consist of coloured insulation and copper wires inside. These three wires are what connect your appliance to the plug, and the plug to the power outlet.
The three wires are:
LIVE: Brown
NEUTRAL: Blue
EARTH: Green and Yellow stripes
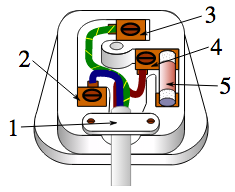
And these wires connect to their respective pins in the plug. These pins have little screws on top, which you can loosen in order to free the wires, or insert them to create connections.
The plug itself, usually consists of:
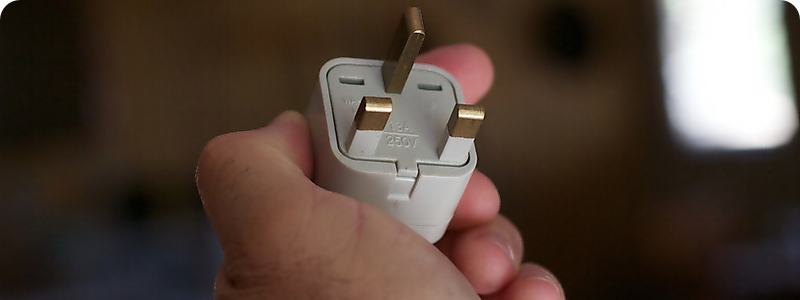
- The three brass pins.
- A fuse which breaks the circuit in case of a high current.
- A cable grip which keeps the cable in place.
- A plastic cover.
What Goes Where?

As per the diagram above, the actual layout of the plug is easy to acquaint yourself with. Earth is always located in the centre at the top, Live on the right and Neutral on the left and a little bit closer to the cable grip. So to associate:
- Blue with Left
- Brown with Right
- Green and Yellow with Centre
How To Do It:
Here are the easy steps for conquering that plug:
- Unplug the plug from the wall socket (if it’s already attached) and unscrew it to open it up. The plug will then face you as illustrated in the above diagram, though the terminals may be empty if this is a new attachment.
- Unscrew the smaller screws at each pin to loosen them, and remove the wires to check for faults or remove damaged ends.
- Use a craft knife or a similar tool, to cut through the insulation of your main wire of the appliance. Be careful not to cut the three wires beneath, as this will damage them. Peel back the insulation to reveal them. Be sure to reveal enough to span the length of the inside of the plug.
- Secure the main cable in place with the cable grip.
- Strip back a few millimetres of the insulation on each of those wires, to reveal the copper wiring beneath. If your wires were damaged and this is a fix up rather than a new installation, you’ll want to cut back the wires until you can restore their integrity, and follow the same steps.
- Carefully insert each of the copper wire ends into the respective terminals. Blue to Neutral, Brown to Live, Green and Yellow striped to Earth.
- Tighten the small pin screws at each terminal, but be sure not to tighten them too much, as this will squash the wires and stop them from conducting a sufficient amount of electricity.
- Carefully replace the plastic covering of the plug and screw into place.
And now you know, the burning question has been answered. Knowing how to wire a plug can be pretty empowering, and if you’re interested in pursuing some active DIY, you should probably check out some courses first – better to be safe than sorry! Remember to play it safe when working with electricity.